Use the Object tools to move the lower cylinder up so it is over the one above it.
Once you have it there use the View tools to zoom in and center on the two cylinders. Next use the Object Scale tool to make the highlighted cylinder uniform but just a bit smaller then the other one by holding down the right mouse button to rescale it.
Now change to the Side View, use the Move Object tool to move the highlighted cylider up just a bit.
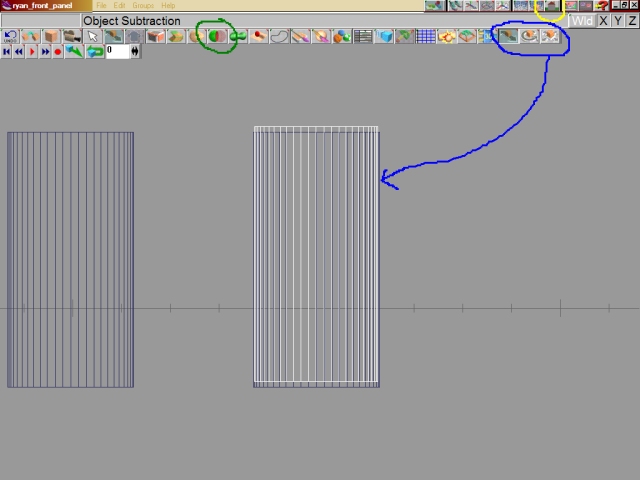
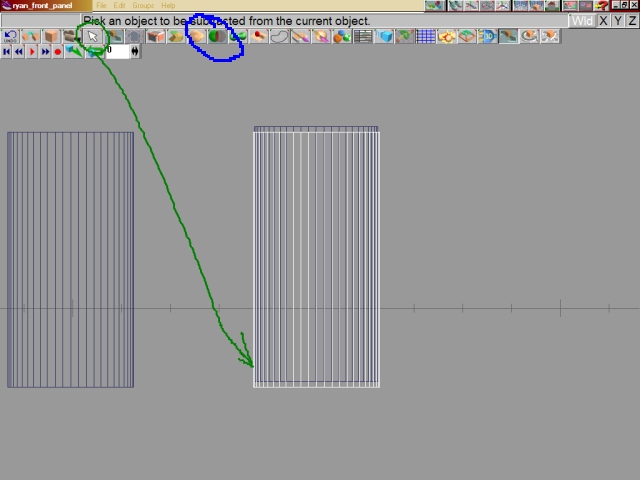
Click on the Select Object tool and highlight the lower cylinder. Next click on the Object Subtraction tool and a little eraser icon will replace your mouse pointer. Put this icon on the NON highlighted cylinder (the one on the inside) and left click. This will subtract the area of the NON highlighted cylinder from the highlighted cylinder.
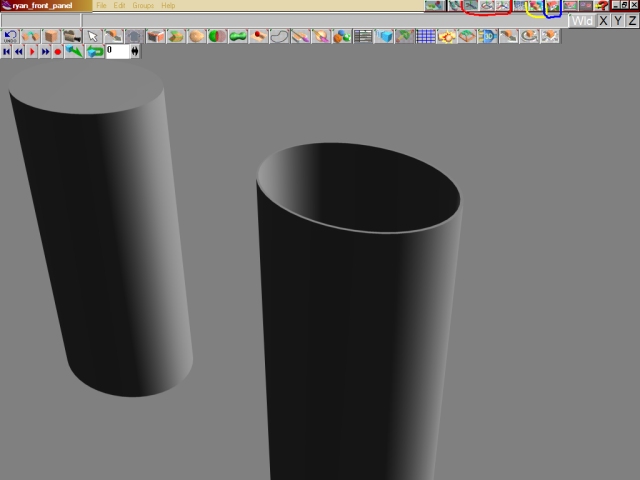
Change to the Perspective View and use the View tools to move around your creation. When you have it where you want it click on the Render tool and let out a big OOOOOO....AHHHHH....Kewl!!, you just made the fuselage area around the cockpit.
OK, back to work!!
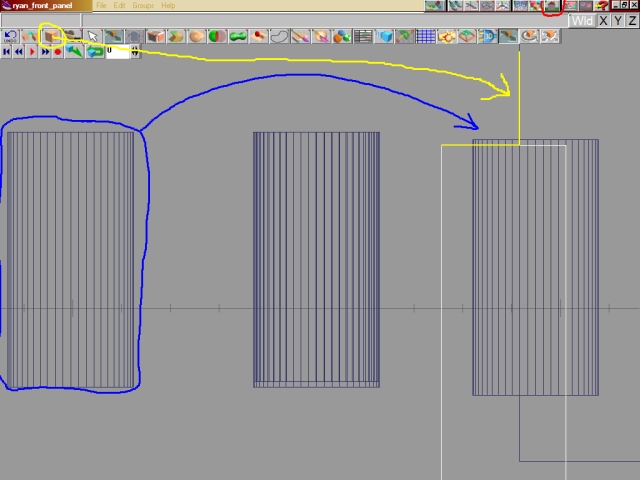
Change to the Side View. Make a copy of the extra cylinder and move it over using the Object Move tool (didn't color code it, lets see if you know what it is?!?!?). Now make two Square Primitives and use the Object Move tool to place them over the cylinder. Once the squares are placed use the Object Scale tool to make the squares into rectangles and large enough to cover the cylinder. If you look at the yellow highlight (backwwards "L") what is happening is we are framing the panel face to be subtracted from the cylinder. Once subtracted the panel face will be that small piece of the cylinder just under the tip of the blue arrow.